
Overview
WooCommerce Payment in Booktics lets you take booking payments on your WooCommerce checkout instead of a separate gateway. When a customer books a service and chooses WooCommerce, Booktics hands the booking to the WooCommerce cart and the customer pays with any gateway you already run there. It is for store owners who want bookings and products to share one checkout and one order flow.
Without it, you would maintain payment gateways twice, once for your shop and once for bookings. This integration reuses the WooCommerce checkout you already trust, so card processing, taxes, and order records stay in one place.
Requirements
- Booktics installed and active.
- WooCommerce installed and active.
- At least one WooCommerce payment gateway set up and enabled (for example Stripe, PayPal, or Cash on Delivery).
- One published Booktics service with a price.
- Guest checkout enabled in WooCommerce (optional, but recommended so customers are not forced to log in before paying).
Step 1: Install and activate WooCommerce
Booktics needs WooCommerce present before it can pass a booking to checkout. You can install it without leaving Booktics.
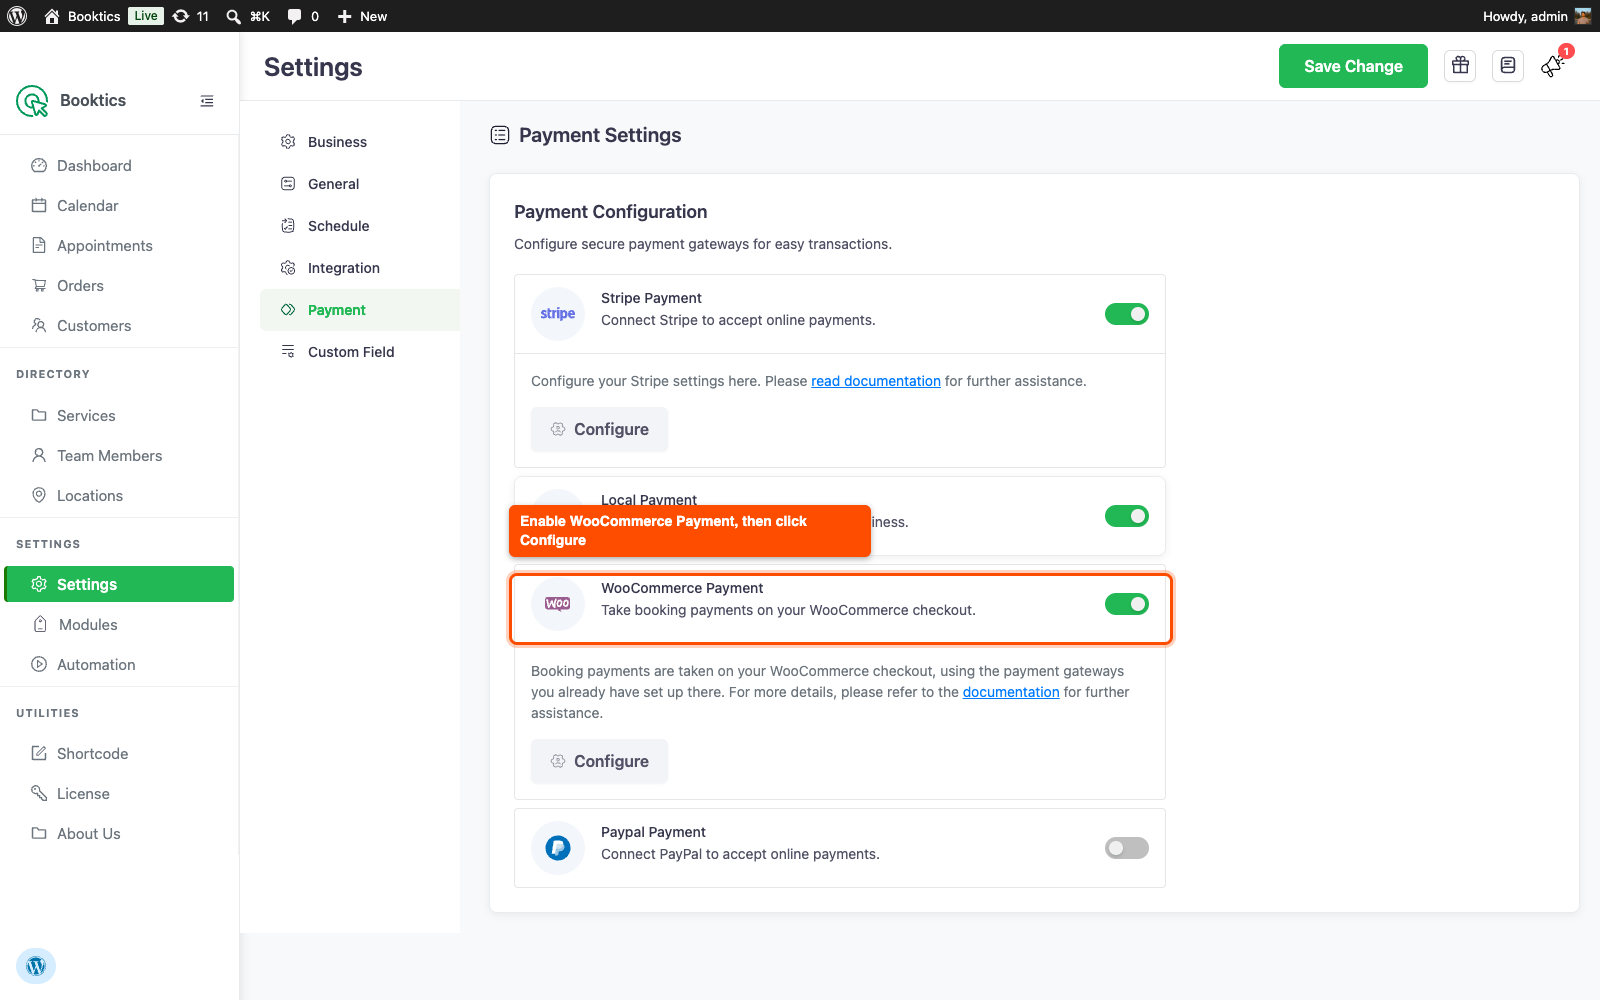
- Go to Booktics → Settings → Payment.
- Open the WooCommerce Payment row.
- If WooCommerce is missing, click Install WooCommerce. If it is installed but inactive, click Activate WooCommerce.
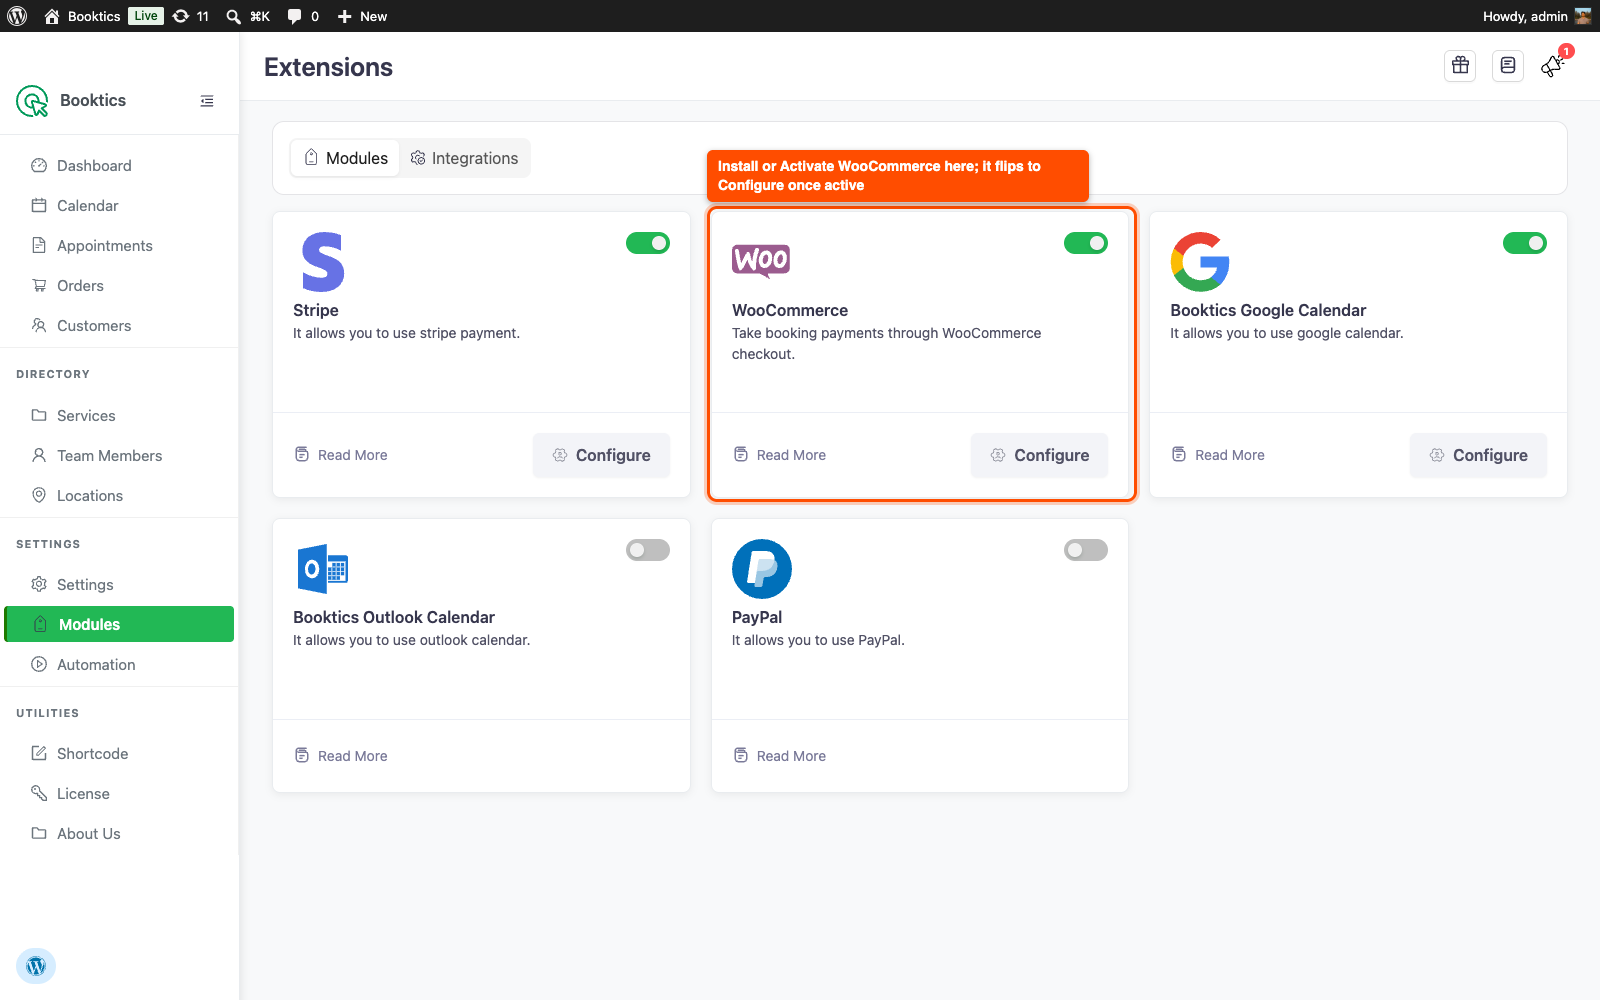
You can do the same from Booktics → Modules, where the WooCommerce card shows an Install or Activate button until WooCommerce is running. Once active, the card switches to a Configure button.
Step 2: Enable WooCommerce as a payment method
Turn the method on so it appears to customers during booking.
- Go to Booktics → Settings → Payment.
- Find WooCommerce Payment and turn its toggle on.
- Save your settings.
WooCommerce Payment now shows as an option on the booking form for any service that has a price.
Step 3: Configure the checkout behavior
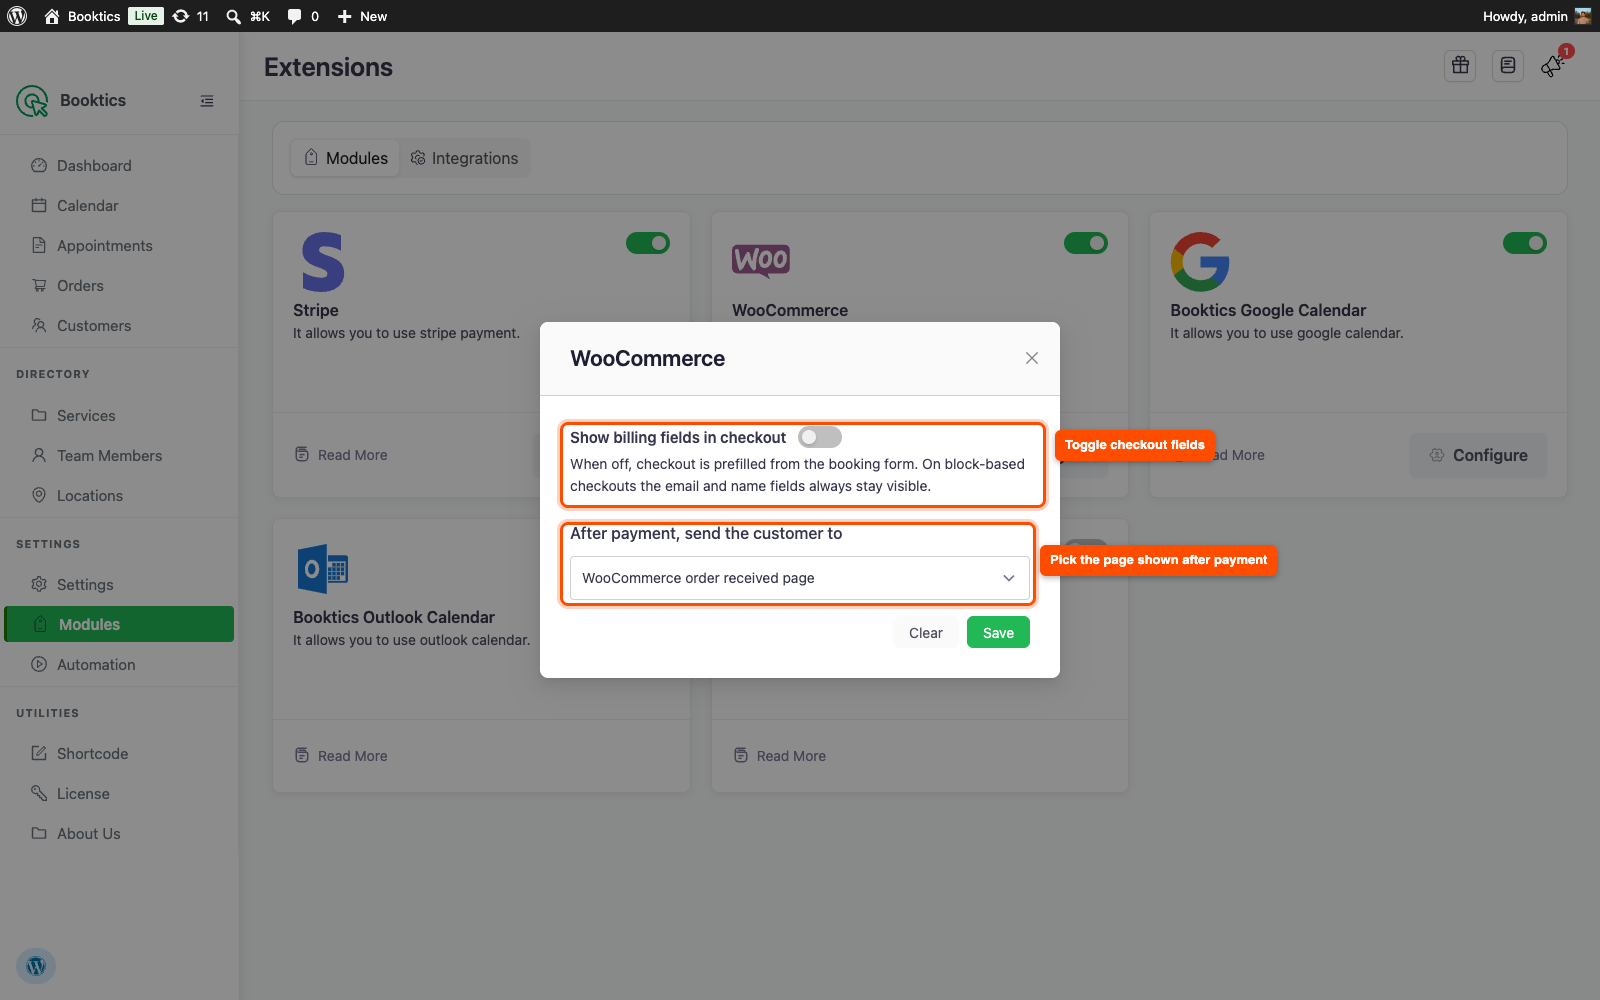
Open the Configure view for WooCommerce (the Configure button on the Modules card, or the WooCommerce Payment row on the Payment tab) to set two options.
- Show billing fields in checkout: When off, the WooCommerce checkout is prefilled from the booking form so the customer is not asked twice for their details. When on, the standard WooCommerce billing fields are shown. On block-based checkouts the email and name fields always stay visible.
- After payment, send the customer to: Choose WooCommerce order received page to end on WooCommerce’s own thank-you page, or Booktics booking page to return the customer to the page they booked from.
Step 4: Take a test booking
Confirm the flow end to end before sending customers through it.
- Open a page that lists a priced service and start a booking.
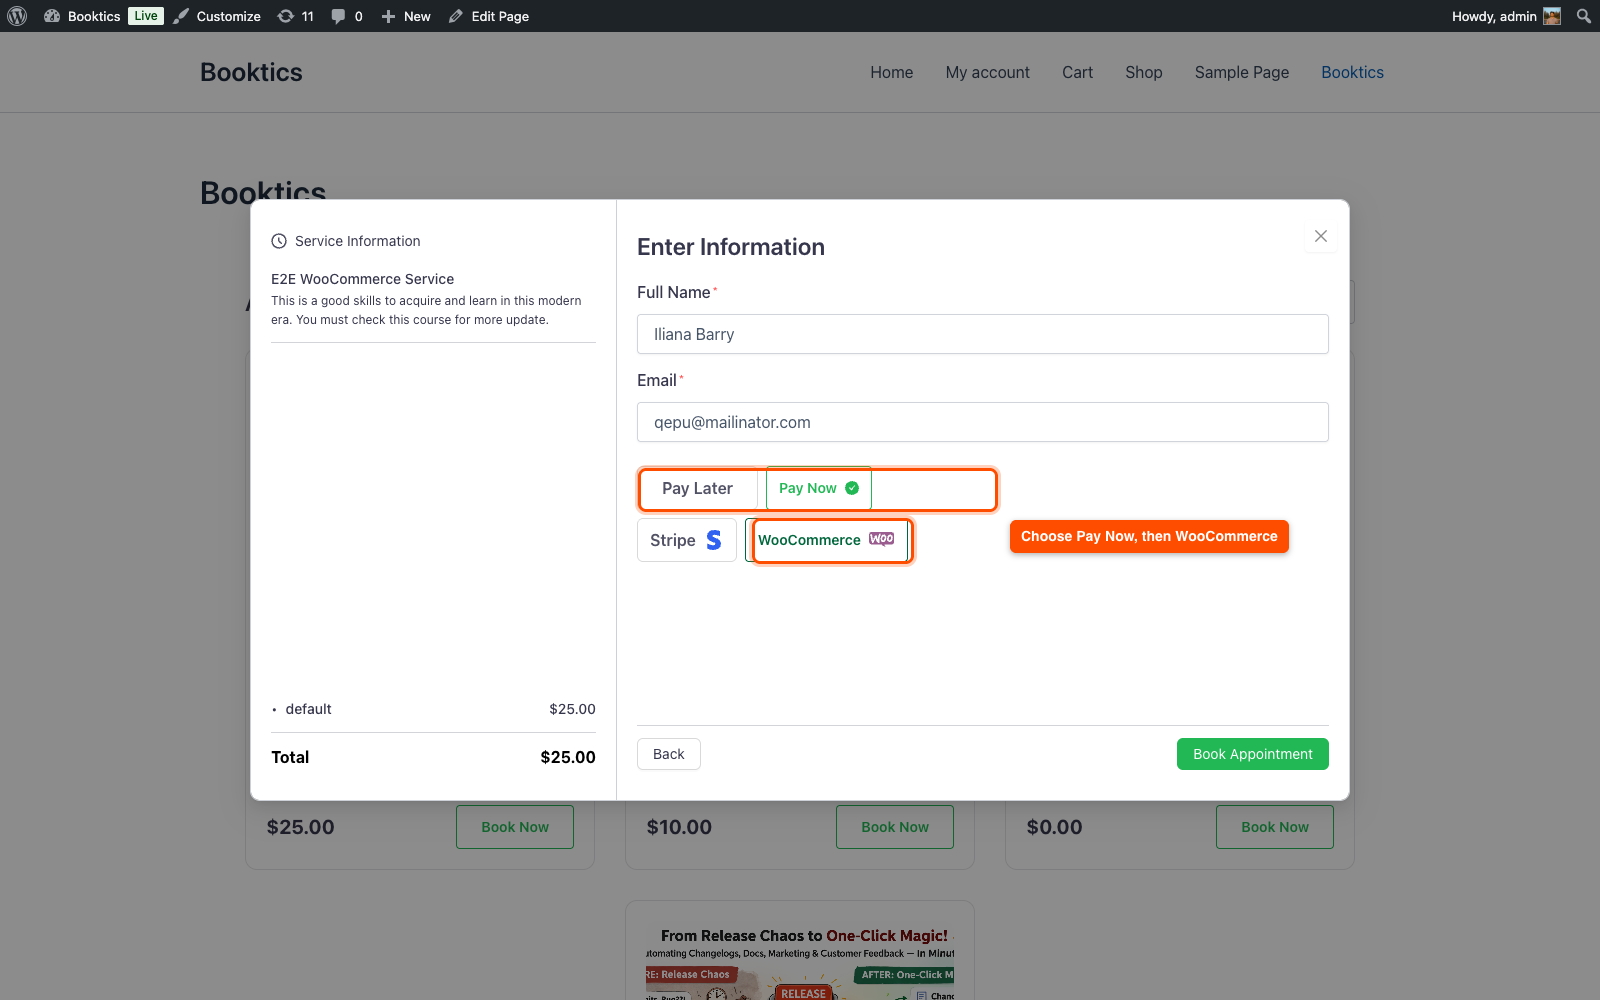
- Fill in the booking details, choose Pay Now, and select WooCommerce.
- Click Book Appointment. Booktics places the booking in the WooCommerce cart and sends you to the WooCommerce checkout.
- Complete payment with any active gateway.
After payment, the customer lands on the page you picked in Step 3, and the appointment appears in Booktics → Appointments.
Frequently Asked Questions
| Q: How does Booktics map the WooCommerce order status to the booking? Booktics keeps the booking’s payment status in step with the WooCommerce order. Processing maps to Processing, On hold, Pending payment, and Failed map to Not Paid, Completed maps to Fully Paid, Cancelled maps to Cancelled, and Refunded maps to Refunded (a partial refund shows as a partial payment). The confirmation email is sent once, the first time the order is paid. |
| Q: My Booktics currency and WooCommerce currency are different. Which one is charged? The customer is charged in the WooCommerce currency, because payment happens on the WooCommerce checkout. The booking’s number is passed through as-is with no currency conversion. Set both currencies to match so a service priced at 50 is not charged as 50 of a different currency. Booktics shows a warning when the two differ. |
| Q: Do I need to create a WooCommerce product for each service? No. Booktics mirrors every priced service as a hidden WooCommerce product automatically and keeps it in sync when you edit the service. These products stay out of your shop, search, and product feeds, and they cannot be bought on their own. They exist only to carry the booking through checkout. |
Conclusion
WooCommerce Payment in Booktics puts your bookings through the WooCommerce checkout you already run, with automatic product mirroring and two-way status sync. Enable it under Booktics → Settings → Payment, run one test booking, and start taking booking payments alongside your store orders.