How to Schedule a Meeting With WP Timetics
From its very inception, WP Timeticshas distinguished itself, not merely as another tool, but as the gold standard in meeting management. Serving its robust set of features to thousands, it has transformed the often tedious task of scheduling into a breeze.
WP Timetics isn’t just another scheduling tool—it’s the answer to every ‘When are you available?’ email you’ve ever sent or received.
For both seasoned professionals and newcomers alike, this guide on how to schedule a meeting with WP Timetics will illuminate the step-by-step process of harnessing the full potential of WP Timetics for your scheduling needs. So, let’s get into this WP Timetics scheduling guide and embark on this journey towards impeccable time management.
Shall we?
What WP Timetics Offers to Streamline Your Schedule?
As we’ve already claimed, using WP Timetics for meetings isn’t just including another scheduling tool; it’s a paradigm shift in how we manage time and appointments. With a blend of powerful features and user-friendly interfaces, it’s the ultimate solution for professionals seeking to optimize their meetings.
Before starting the core part of this discussion, we need to discuss the benefits of WP Timetics for scheduling. Hence, before getting into the discussion on how to schedule a meeting with WP Timetics, let’s get introduced to what makes it exceptional:
- Unlimited Capabilities: Schedule an endless number of meetings, handle countless bookings, and onboard as many staff members as you need without any additional costs.
- Diverse Meeting Options: From personalized one-to-one sessions to expansive one-to-many webinars or workshops, WP Timetics has you covered. For events where seating matters, the one-to-many with seat plan feature ensures every attendee gets the best spot.
- Intuitive Integrations: Smoothly process transactions with Stripe and WooCommerce, host meetings on platforms like Google Meet or Zoom, and never miss an appointment with integrations like Google Calendar, iCal, and Outlook.
- Enhanced User Experience: Embed scheduling functionalities effortlessly with shortcodes, allow clients the freedom to manage their bookings via a user dashboard, and erase timezone confusions with the auto-detection feature.
- Advanced Analytics and Notifications: Gain insights into your business’s performance with sales analytics and ensure everyone stays in the loop with automated email notifications. Setting up reminders in WP Timetics has also been way easier now.
- Customizability and Control: Set your working hours, manage special availability, and adapt the booking form to glean vital information from your clients.
- Future-Ready Features: Leverage the power of artificial intelligence to provide meeting recommendations, and set up recurring appointments to automate repetitive schedules.
Using WP Timetics for meetings means more than just simplifying scheduling; it’s about enhancing the entire booking journey for both the service provider and the client. In the later part of this WP Timetics scheduling guide, we’ll let you know the types of meetings that WP Timetics can schedule.
The Types of Meetings That WP Timetics Can Schedule

WP Timetics offers a versatile range of meeting types, catering to various needs and scenarios. Whether you’re a solopreneur conducting one-on-one coaching sessions or a business hosting large-scale webinars, WP Timetics has got you covered. This WP Timetics scheduling guide will walk you through the entire process step by step.
Let’s delve into the different types of meetings you can schedule with this powerful plugin where the benefits of WP Timetics for scheduling will also be illustrated. After that, we’ll dive deeper into the process of how to schedule a meeting with WP Timetics.
1. One-to-One Meetings
At its core, a one-to-one meeting is an intimate interaction between two individuals. Tailored for personal exchanges, this format ensures that both parties can communicate effectively without distractions. Whether you’re diving into a detailed client briefing, conducting a personalized consultation, or having a coaching session, WP Timetics provides the platform. It allows these sessions to be set up virtually, like on Google Meet, or as face-to-face interactions. The result? A dedicated space for meaningful and focused discussions.
2. One-to-Many Meetings
As the name suggests, this format involves one host engaging with multiple participants. Think of it as a stage where the host is the speaker, and the audience can range from a few individuals to hundreds. Be it webinars, group workshops, training sessions, or product launches; using WP Timetics for meetings ensures smooth scheduling and execution. The beauty of this format lies in its ability to disseminate information or engage with a broad audience simultaneously.
3. One-to-Many With Seat Plan
Imagine events where the seating position matters—a conference where attendees want an unobstructed view, or a theater show where the experience differs based on where one sits. This is where the one-to-many meeting with a seat plan comes into play. WP Timetics offers a feature where attendees can choose their preferred seats, ensuring they get the best experience. On the organizer’s side, it provides a structured layout, making event management more streamlined and efficient.
In the world of meetings and scheduling, versatility is key. By using WP Timetics for meetings, you’re not just getting a scheduling tool; you’re embracing a solution that understands and caters to the nuanced needs of modern professionals.
Prerequisites to Set Up WP Timetics
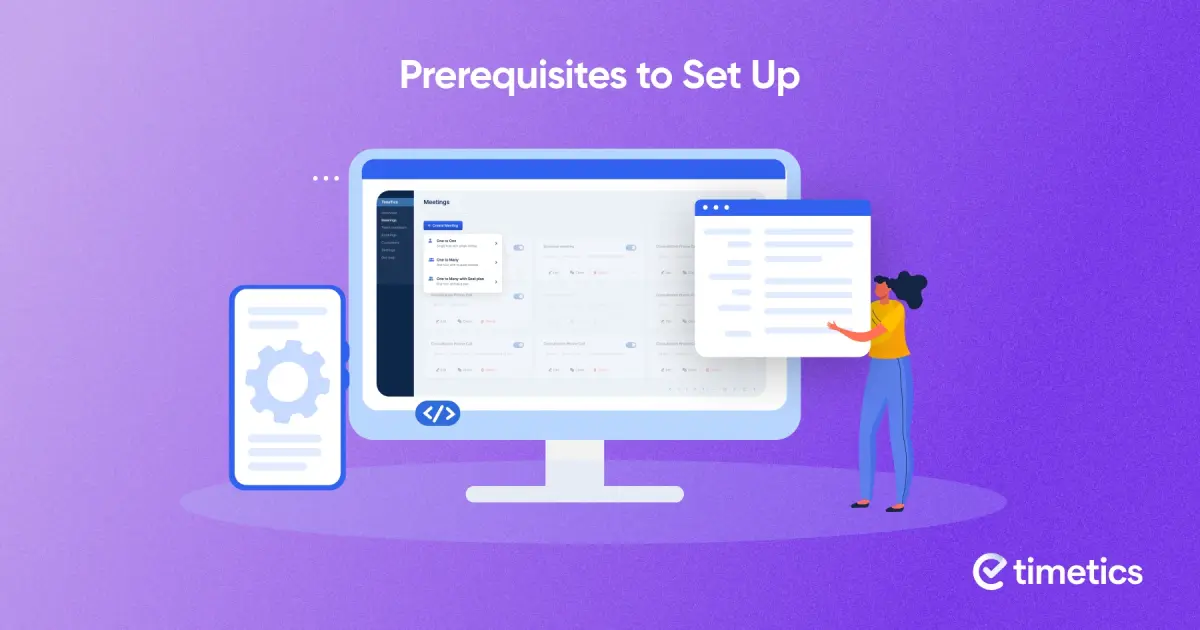
There are many benefits of WP Timetics for scheduling. But before diving into the main part of how to schedule a meeting with WP Timetics, it’s crucial to ensure you have everything in place for a smooth setup. Here are the prerequisites you should keep in consideration:
- WordPress Installation: Ensure you have a running WordPress website. WP Timetics is a plugin designed specifically for the WordPress platform.
- Updated PHP Version: For optimal performance and security, it’s recommended to use a PHP version that’s 7.3 or higher.
- Secure Hosting Environment: A reliable web host ensures that your scheduling system runs smoothly, without interruptions. Consider hosts that provide regular backups and strong security measures.
- SSL Certificate: If you’re planning to handle payments directly through your website, an SSL certificate is a must. This encrypts data transfers, ensuring client information and transactions are secure.
- WP Timetics Plugin: Purchase or download the WP Timetics plugin. Keep the installation files ready.
- Integration Accounts: If you’re planning to integrate WP Timetics with platforms like Google Meet, Zoom, Stripe, or WooCommerce, ensure you have active accounts on these platforms.
- A Clear Agenda: Before setting up, have a clear idea of your scheduling needs. This includes the types of meetings you’ll host, their durations, and your availability.
- Backup: Always back up your current WordPress site before installing new plugins. This ensures you have a fallback option in case of any unforeseen issues.
Once these prerequisites are in check, you’re all set to leverage the power of using WP Timetics for meetings and revolutionize your scheduling system. Now we can discuss how to schedule a meeting with Timetics WP.
How to Create One-to-One Meeting With WP Timetics
When your WP site is ready, it’s time to install the WP Timetics plugin on your website. Right after the installation, you’ll gain access to all the necessary functions. The One-to-One Meeting feature is mainly required for specific types of meetings where one-on-one personalized communication is necessary, such as counseling and medical consultations.
Now, we’ll guide you through the process of scheduling a one-on-one meeting with WP Timetics, which is also part of the overall instructions on how to schedule a meeting with WP Timetics. Have a look-
Step-1: Setting Up Meeting Category
To set up your meeting category, login to your WP dashboard first. Then click on the “Timetics” located on the left sidebar. Go to “Meetings” and then click on “Create New Category”. Add “Category Name” and assign the category to your desired meeting.

You can also create subcategories under the mother categories. To get more detailed instructions, you can check out this documentation.
Step-2: Creating the One-to-One Meeting
Once your meeting category is ready, you can start creating the meetings considering the meeting type you need. To create a one-to-one meeting, go to “Timetics” first, then click on “Meetings”. Now click on the “Add New” button. It will show you the following interface-

Step-3: Inputting the Meeting Details
If you’ve followed the previous step correctly, it will show you the following interface (as shown in the screenshot below).

Fill out the form with necessary details such as Meeting Title, Date (when you want to schedule your meeting), Meeting Time Zone, Host, etc. Once the process is complete, click on the Create Menu button.
You can also make some other necessary changes such as Availability Customization, Meeting Visibility, etc. For more details on how to schedule a meeting with WP Timetics, you can check out this documentation where we’ve shown how you can do these step by step.
Once you’ve done all perfectly, you can click on the Create Meeting button to make your one-to-one meeting live.
How to Create One-to-Many Meeting With WP Timetics
When you need to address a broad audience, train multiple employees at once, or launch a new product to a wide customer base, WP Timetics’ one-to-many meetings come to the rescue. This format is not just about reach but also about efficiency. Instead of repeating the same content in multiple individual sessions, you can convey your message in a single, comprehensive session.
The process of creating a One-to-Many meeting with WP Timetics is quite similar to creating a one-to-one meeting. The only difference is that in one-to-many meetings, you need to provide some additional information such as Ticket Name, Price, Quantity, etc.
Furthermore, by clicking the Add Tickets button, you can also add multiple types of tickets.

How to Create One-to-Many With Visual Seat Plan
WP Timetics has gained immense popularity due to its visual seat plan feature, which provides enhanced convenience while scheduling your meetings. This is one of the biggest benefits of WP Timetics for scheduling purposes. Interestingly, scheduling meetings with this feature is quite similar to the process of creating one-to-many meetings with WP Timetics.
Now, we’ll walk you through the process of creating one-to-many meetings with the magic of the visual seat plan. So, let’s discuss now how to schedule a meeting with WP Timetics!
Step-1: Meeting Creation
At first, you need to create a meeting to utilize the visual seat plan feature. The process is quite simple. Here is the sequential process for your convenience:
- Log in to your WP Dashboard
- Click on Timetics
- Select Meetings
- Click on the Add New button
- Choose One-to-Many with Seat Plan
If you’ve completed all the steps correctly, it will display the following interface-

Depending on your meeting type, fill out the form with all the necessary details. You can check out this documentation to learn how to input these details. Right after inputting all the details correctly, click on the Create Meeting button.
Step-2: Seat Decoration
When your meeting is created, it will show you the following interface. Now it’s time to set up your seat plan. Click on the seat icon located at the top left corner of your screen. It will provide you with a bunch of options to organize your seat layout.

As you can see from the screenshot above, WP Timetics’ visual seat plan feature not only allows you to generate seats but also lets you customize the seat color as per your preference. You also can take different shapes to decorate your seats. To know the complete details, you can check out this documentation on seat decoration with WP Timetics.
Step-3: Table With Seat Decoration
By using WP Timetics for meetings, you can design your seat plan using a table-like layout. This feature is particularly useful for restaurants, seminars, parties, and other events where you can choose the number of tables you need and set the number of seats for each table with WP Timetics.

The process of seat decoration with tables is almost similar to the process of seat decoration with WP Timetics (that we’ve previously discussed). But for your convenience, we want to represent the process of how to schedule a meeting with WP Timetics in a clear format-
- Create one-to-many meeting with visual seat plan
- Go to the canvas page
- Click on the Generate Table With Seat icon
- Select the Ticket Type and then select the number of tables as per your preference and assign the number of seats for each table (considering the total number of tickets)
- As your last step, click on the Generate button
If you’ve finished the entire process correctly, it will generate the number of tables you’ve selected. You can rearrange these tables with drag and drop. Also, you set different colors for different tables as usual. If you need more clear details, you can check out this documentation as well.
Step-4: Seatplan from Frontend
Once you’ve completed decorating your seats from the back end, it’s time to make your meetings LIVE so that your customers can schedule their appointments and book their desired seats. As your first step, you should follow the process to show the meetings on the front end.
If you’ve completed the entire process correctly, your meeting interface on the front end should look like this-

Now, select your preferred date. It will show you the list of available time slots from where you should select your convenient time. After that, you’ll be shown the following interface –

Now, select your desired seat from the seat map. Once you’ve chosen your seat, it will be automatically reserved for your selected time. Next, click the Next button to proceed. This will take you to a new page where you’ll be asked to provide some additional details about your meeting. Fill out the form with the necessary information, and then click on the Confirm Appointment button. Congratulations! Your meeting has been successfully scheduled.

General Precautions for Scheduling with WP Timetics
While WP Timetics is a powerful tool designed to streamline your scheduling process, it’s essential to approach its setup and usage with some caution. Properly managing your scheduling ensures a smooth experience for both you and your clients.
Even though you can enjoy numerous benefits of WP Timetics for scheduling purposes, here are some general precautions to consider before focusing on how to schedule a meeting with WP Timetics-
- Clear Availability Settings: Ensure that your availability is accurately set up in the system. Misconfigurations can lead to overbookings or missed appointments.
- Manage Overlaps: When setting up group meetings or one-to-many sessions, ensure there’s no overlap with other scheduled appointments.
- Email Notifications: Regularly review and test the email notification system to ensure that both staff and customers are receiving timely and accurate updates about their appointments. Setting up reminders in WP Timetics also enables you to get reminder emails before your meeting starts.
- Integration Checks: If you’re using third-party integrations like Google Meet or Zoom, periodically test these to ensure there’s seamless connectivity and no last-minute hitches during meetings.
- Pricing Transparency: If you’re charging for appointments, ensure that all pricing details are accurate and transparent. Regularly review and update them if necessary.
- Review Seat Plans: For meetings with seat plans, periodically review the layout to ensure it matches the physical or virtual setup. This ensures attendees get the experience they expect.
- Feedback Collection: Use WP Timetics’ feedback tools to regularly gather insights from your clients. This can help you preemptively address potential issues.
- Update Meeting Types: Ensure that the types of meetings you offer (One-to-One, One-to-Many, etc.) are still relevant to your current services. Update or remove outdated meeting types.
Frequently Asked Questions (FAQ)
Navigating the world of scheduling plugins can raise numerous questions. To help you better understand the WP Timetics scheduling guide, we’ve addressed some of the most frequently asked questions below:
Is WP Timetics Free to Use?
WP Timetics offers a basic version that’s free to use, providing users with essential scheduling (one-to-one meeting) functionalities. This version is great for individuals or small businesses starting their scheduling journey. However, for advanced features and integrations, considering the Pro version might be beneficial. But no matter the version you use (Free or Pro), some features will be available for both versions such as setting up reminders in WP Timetics, creating one-to-one meetings, etc.
How affordable is the WP Timetics Pro version?
WP Timetics Pro is competitively priced, offering a suite of advanced features that provide value for money. Prices vary based on the duration of the license and the number of sites you want to use it on. It’s recommended to visit the official WP Timetics pricing page for the most up-to-date pricing details.
How Many Meetings Can I Schedule with WP Timetics?
With WP Timetics, the sky’s the limit! Whether you’re scheduling one-on-one sessions or large group meetings, there’s no cap on the number of meetings you can schedule. However, always ensure that your hosting environment can handle the traffic and interactions, especially for larger meetings.
How Is Your Technical Support When Individuals Face Challenges While Using WP Timetics?
WP Timetics prides itself on a responsive and knowledgeable support team. Whether you’re facing setup challenges or need assistance with advanced features, the support team is available to guide you. Users have often praised the timely and helpful responses they receive.
Wrapping Up
We’ve journeyed together through the process of how to schedule a meeting with WP Timetics, and we hope you now feel equipped to harness its full potential. It’s not just about scheduling; it’s about transforming how we connect, collaborate, and conduct our professional lives. In this WP Timetics scheduling guide, we’ve delved into its features, laid out the precautions, and hopefully demystified any complexities.
If you’re anything like us, you’ll appreciate tools that simplify life without compromising on efficiency. WP Timetics promises just that. As you set it up and start scheduling, remember the tips and insights shared here. And always know, in the realm of online scheduling, you’ve got a powerful ally in WP Timetics.
To smoother meetings and hassle-free bookings, cheers!