7 Easy Steps on How to Set Multiple Meeting Sessions with WP Timetics
If you’re running a service-based business, then you definitely know how meetings are essential to your business.
In fact, setting up reservations, events, and appointments, and holding up meetings to convert your customers is the gateway to your revenue.
There are multiple ways on how to set multiple meeting sessions, one-to-one meetings, multiple meetings, etc.
But most WordPress booking plugins don’t provide you with multiple meeting types, which Timetics can definitely help you with.
That will do you tons of favor to handle all the meetings in your own strategy.
But how do you do it?
In this article, we’re going to show you how to set multiple meeting sessions with the WP Timetics WordPress booking plugin, no matter which niche you’re in.
Let’s dive in.
How to Set Multiple Meeting Sessions with WP Timetics WordPress Booking Plugin

You can set up One-To-Many meetings on your booking forms, which means, that in your meetings, there will be only one host and multiple invitees. These meetings are the best to run conferences, concerts, Yoga sessions, tutor classes, etc.
✋ P.S.: You must subscribe to WP Timetics PRO to get the One-to-Many meetings feature.
So, before we add multiple meeting sessions (which take less than one minute), let’s ensure you set up Timetics on your WordPress website. Let’s go one-by-one / here’s a step-by-step process:
Step 01: Install & Active WP Timetics on WordPress
First off, go to your WordPress admin dashboard and hit plugin, then install the WP Timetics plugin on your WordPress website. You can find the plugin on the WordPress plugin directory, then hit on Active.
Step 02: Setup Your Plugin Preference
Configure the WP Timetics settings according to your requirements. This may include setting up staff roster, meeting availability, setting up notifications, and configuring integrations. Perhaps, go to our plugin documentation for detailed instructions on how to customize the plugin.
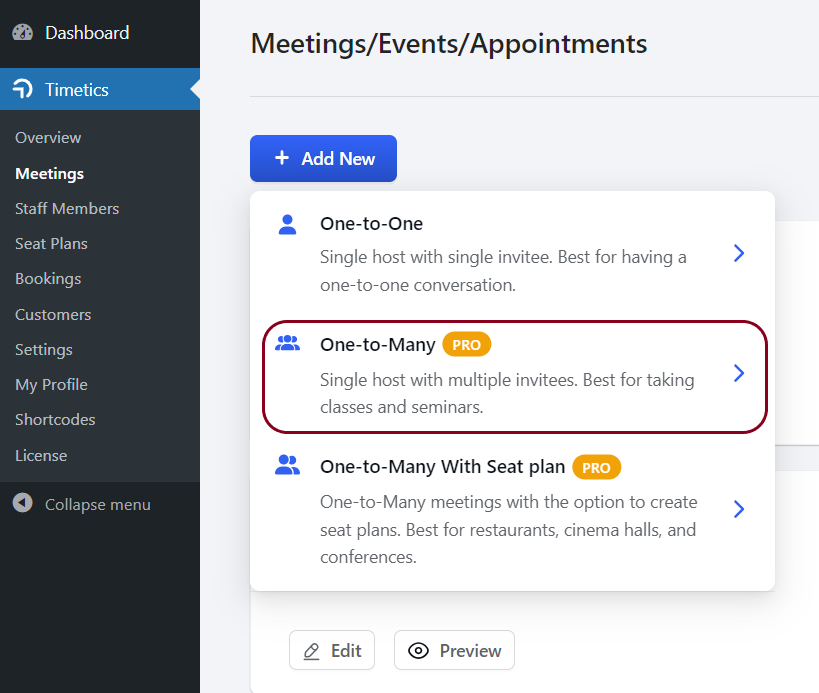
Step 03: Create a One-To-Many Meeting
Now go to WP Timetics->Meetings->Create New->One-to-Many. You will then be directed to your unique meeting page where you need to add details for your meeting.
Step 04: Fill up the meeting requirements
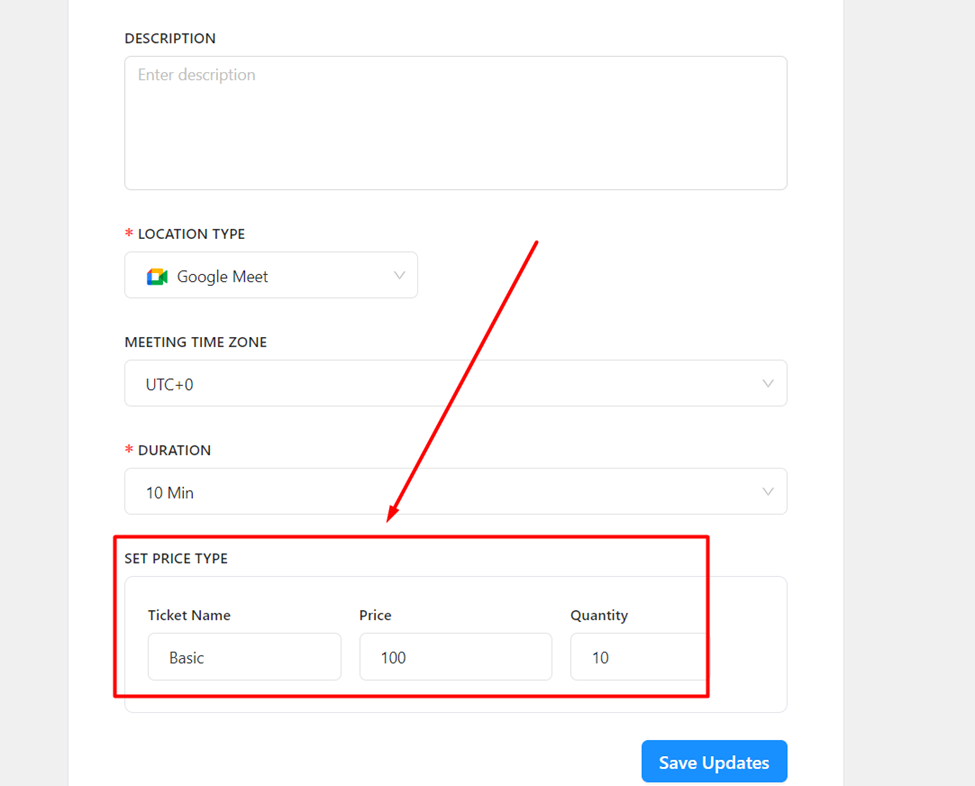
Fill in all the required fields needed for your One-to-Many meeting. Give a nice title, give a compelling meeting description, add the location type (you can get up to 3 location types), set the meeting time zone, customize your session availability, and put in your meeting duration. This will be displayed on the booking forms every time a client visits your webpage.
Step 05: Set the Ticket Types & Prices
Now set the ticket name (for example, Basic, Premium, VIP), set the price for each Ticket type, add seating capacity (how many people you want in your sessions max), and affirm ticket quantity for each set.
P.S: Seating quantity & capacity are required fields, so you must put the information to set up One-to-Many meetings.
After setting everything up, set meeting visibility to public/private and hit “Create Meeting”.
Step 06: Copy & Paste the plugin shortcode
Copy the WP Timetics meeting shortcode generated by the plugin and add it to any page you want on your WordPress website. Your customers will be able to visit your page and choose their preferred meeting sessions.
Step 07: Hit “Create Meeting”
After setting everything up, set meeting visibility to public/private and hit “Create Meeting”.
Now that your meeting is published, you can Duplicate your meetings there to save time.
Try Multiple Meetings with WP Timetics’ Awesome ‘Seat Plan Feature’!
I can bet you already noticed this small section down below when you were creating a one-to-many meeting on the “+Add New” section:
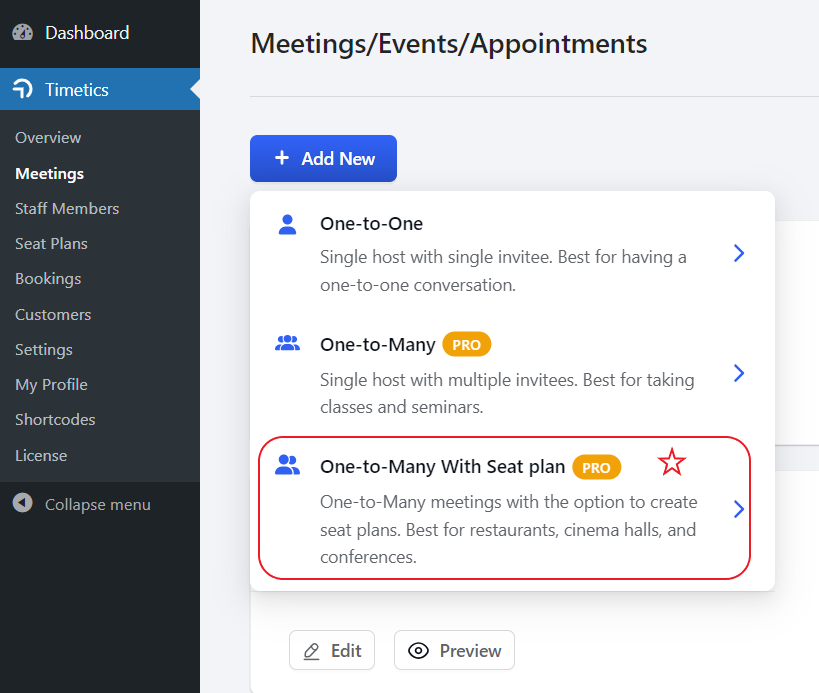
That’s the gem right there.
Meet WP Timetics Visual Seat Plan Feature, the arsenal only developed by WP Timetics so far in the world, is designed to save hours in creating in-depth booking forms for your conference, meetings, public speaking, summit, Yoga sessions, consultancy, etc.
Okay, so what does the Visual Seat Plan do?
The seatplan feature allows you to create meetings, and events with a VISUAL SEAT PLAN and lets you draw seat plans for your venue. This helps you manage your seat plans and set different seating categories, and seat capacity effectively and lets customers book their preferred seats.
And the most amazing part?
You can draw your existing floor plan and work on it to draw new visual seating plans for your meetings. Sounds easy, right?
With WP Timetics Visual Seatplan, there’s no stopping you from creating & managing effective meetings, conferences, cinema, and interview sessions and saving hours of time while doing so with a visual plan.
So why not try something extra effective? Why not try a WordPress booking plugin that saves time with an innovative feature?
🙌 Let’s Try WP Timetics today, change the way you set up multiple meeting sessions on your WordPress website, and grow your online business.