
Overview
The FlowMattic integration in Timetics sends your booking data to FlowMattic, a workflow automation plugin for WordPress. Every time a booking is created, rescheduled, cancelled, paid for, or deleted, Timetics posts the full booking details to a FlowMattic workflow so you can automate what happens next.
Booking data usually stays inside your booking plugin. That means you copy details by hand into a CRM, a spreadsheet, or a Slack channel. This integration hands the whole booking to FlowMattic the moment it happens, so the follow-up work runs on its own.
Requirements
- Timetics and Timetics Pro installed and active
- FlowMattic 7.0 or newer, on this site or on any other site you control
- At least one meeting set up in Timetics, so you have something to test with
Step 1: Create a workflow in FlowMattic
Start on the FlowMattic side, because Timetics needs the webhook address that FlowMattic gives you.
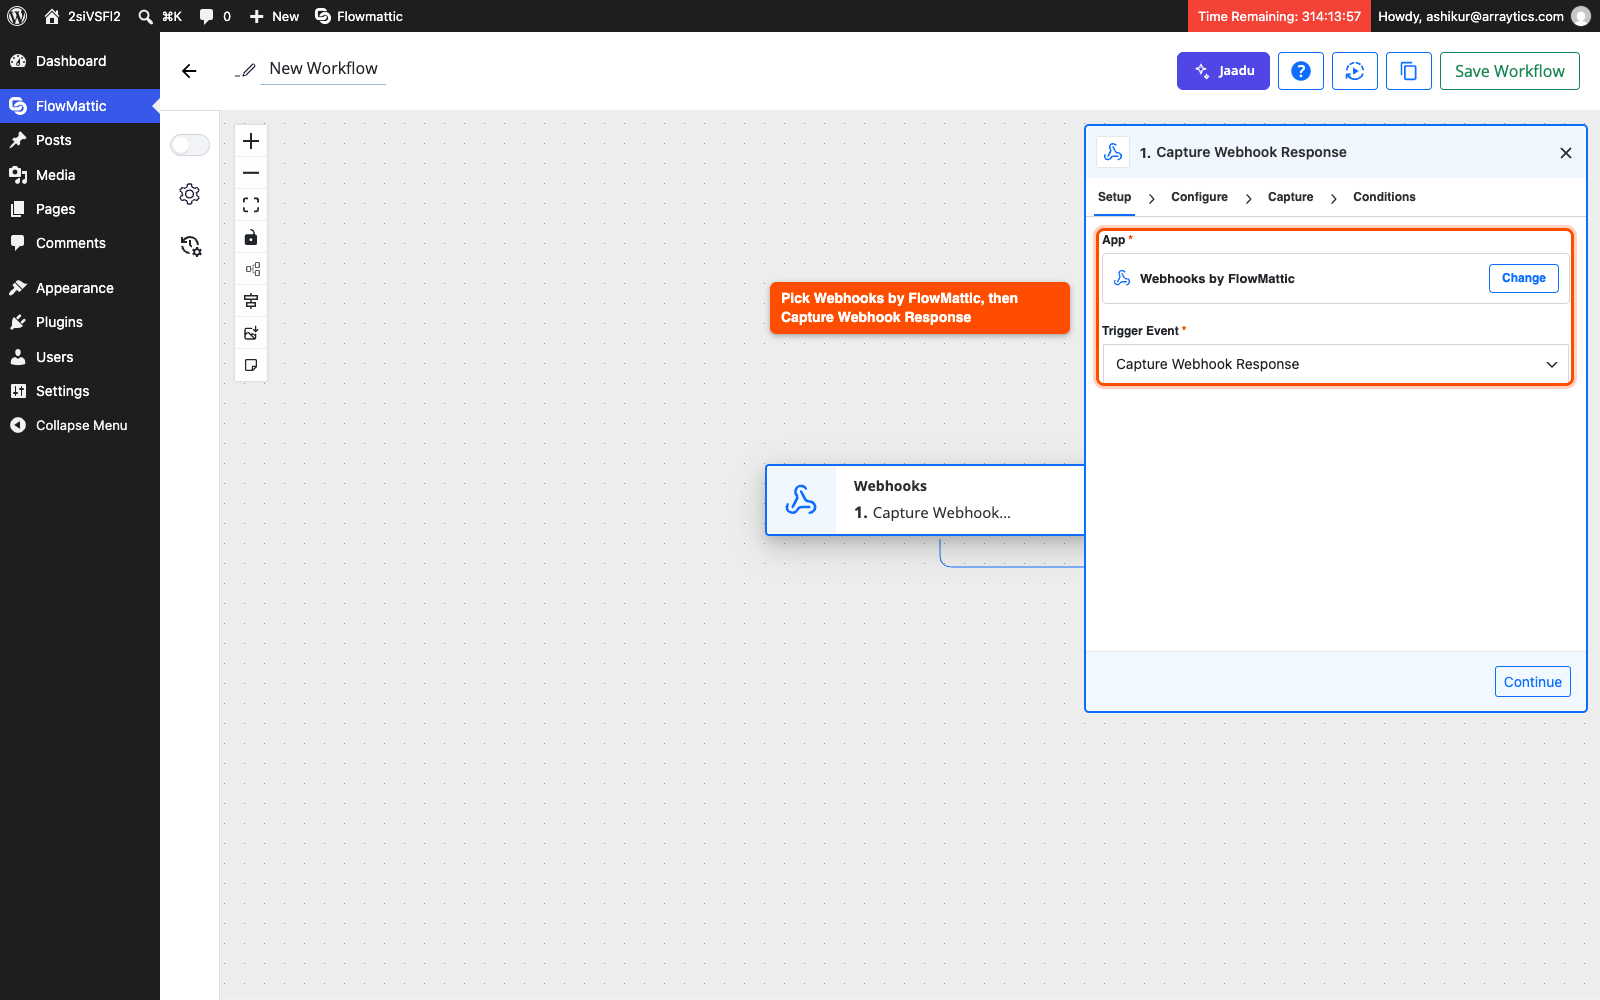
- Go to FlowMattic → Workflows in your WordPress dashboard.
- Click New Workflow and give it a name, for example “Timetics Bookings”.
- On the Setup tab of the first step, leave the App set to Webhooks by FlowMattic.
- Under Trigger Event, choose Capture Webhook Response.
- Click Continue.
Step 2: Copy the webhook URL
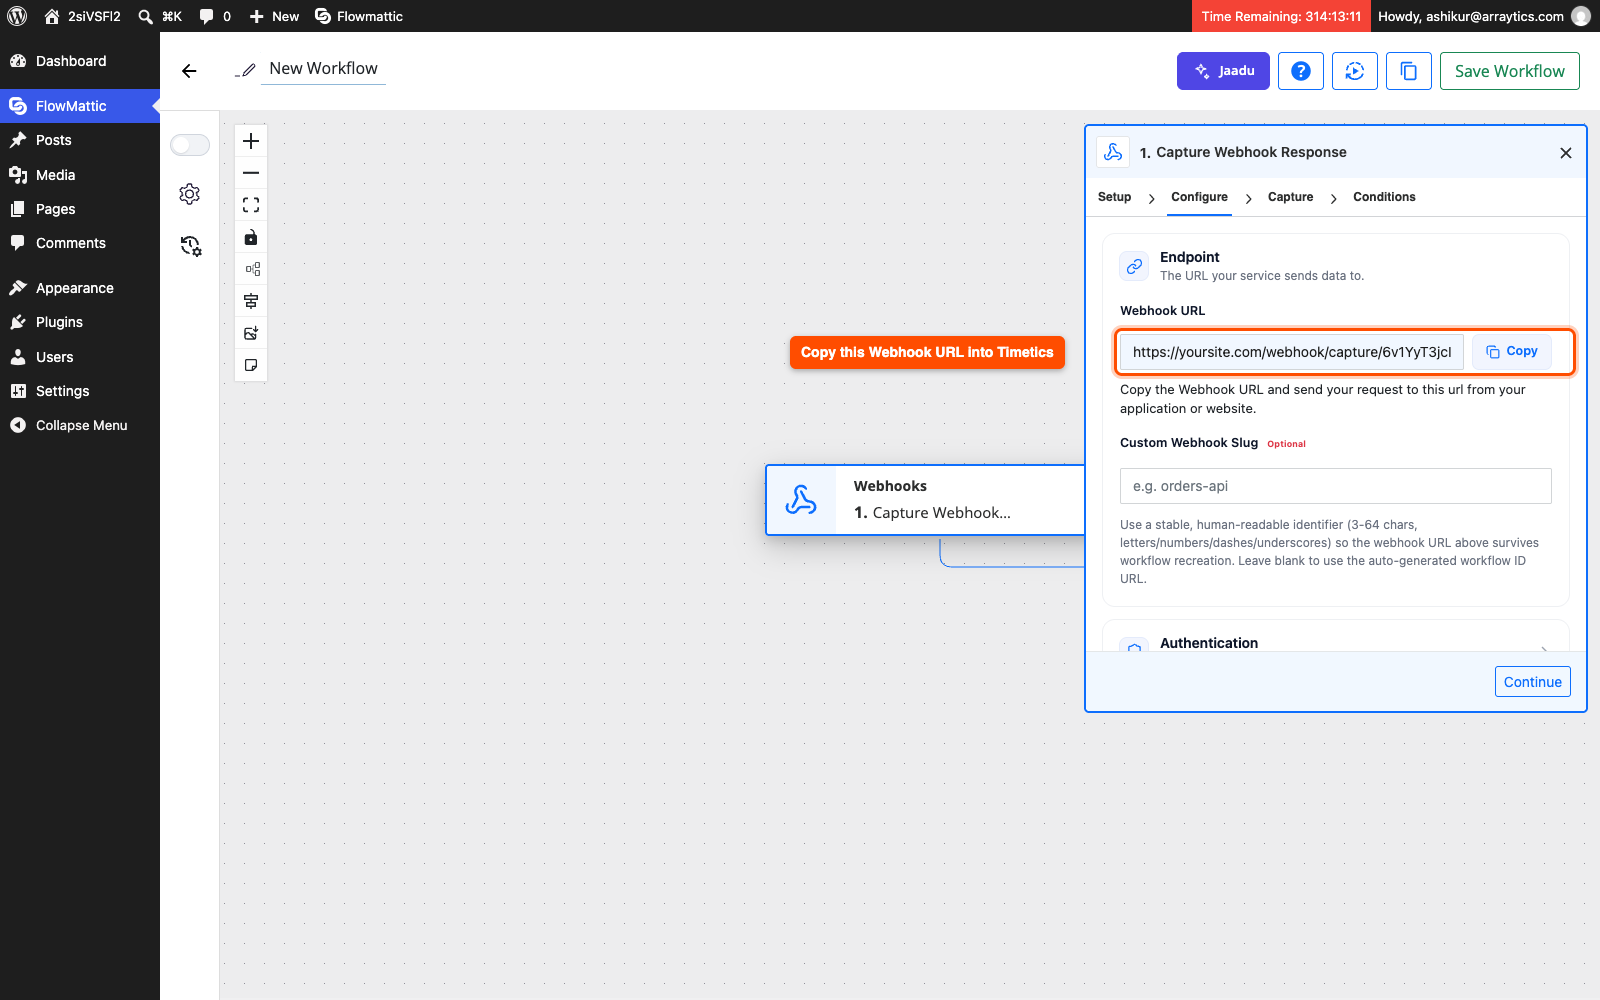
The Configure tab holds the address Timetics posts to.
- Find the Webhook URL field under the Endpoint heading.
- Click Copy.
- Leave the workflow tab open. You need it again in Step 4.
The address looks like this:
https://yoursite.com/webhook/capture/6v1YyT3jcI| Note: Leave Authentication on Open, no authentication. Timetics sends the booking as a plain JSON POST with no key or signature, so a workflow set to require either one rejects it. |
The Custom Webhook Slug field below is optional. Fill it in and the address ends with your own words instead of the generated ID, and it survives recreating the workflow.
Step 3: Paste the webhook URL into Timetics
- Go to Timetics → Settings in your WordPress dashboard.
- Open the Integrations tab.
- Find the FlowMattic card and click Configure.
- Paste the webhook address into the FlowMattic Webhook field.
- Click Save.
One webhook address handles every event. You do not need a separate workflow for cancellations or payments.
Step 4: Capture a test booking
FlowMattic needs to see one real payload before it knows what fields exist.
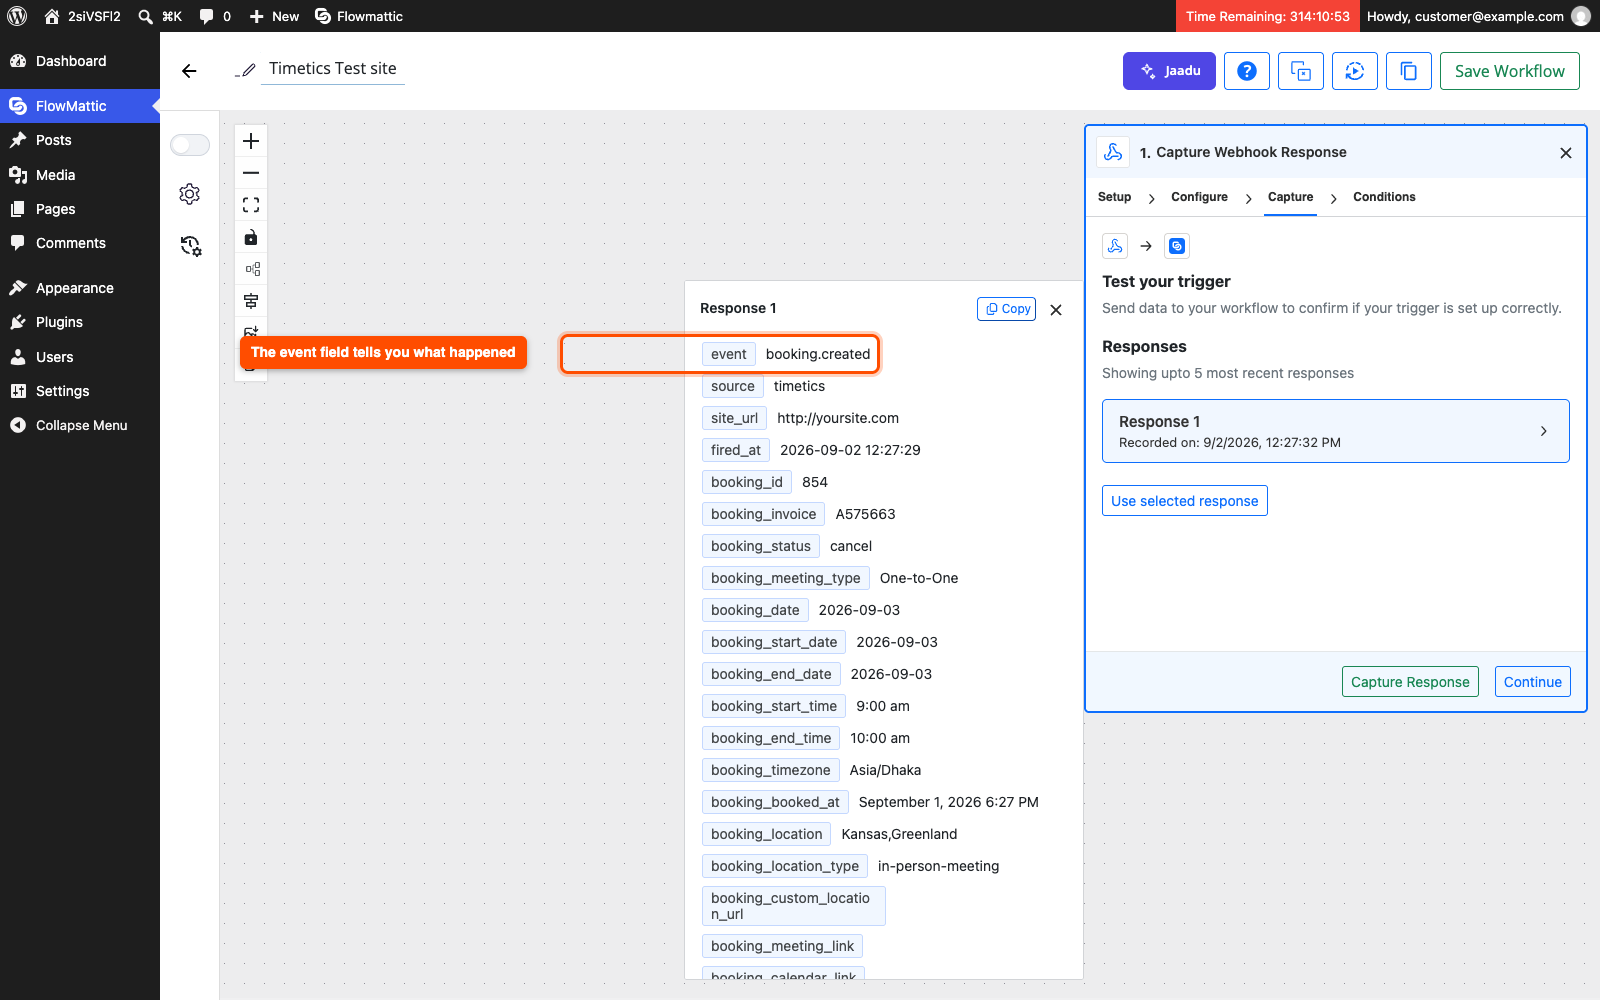
- Go back to your FlowMattic workflow and open the Capture tab.
- Click Capture Response. FlowMattic now waits for data.
- In a second tab, book a meeting on your Timetics booking page.
- Return to FlowMattic. The booking appears as Response 1. Click it to see the fields.
- Click Use selected response, then add your actions and save the workflow.
FlowMattic flattens the payload, so nested values arrive as single fields. The customer email is customer_email, the invoice number is booking_invoice, and the meeting name is meeting_name.
Step 5: Send one meeting to a different workflow
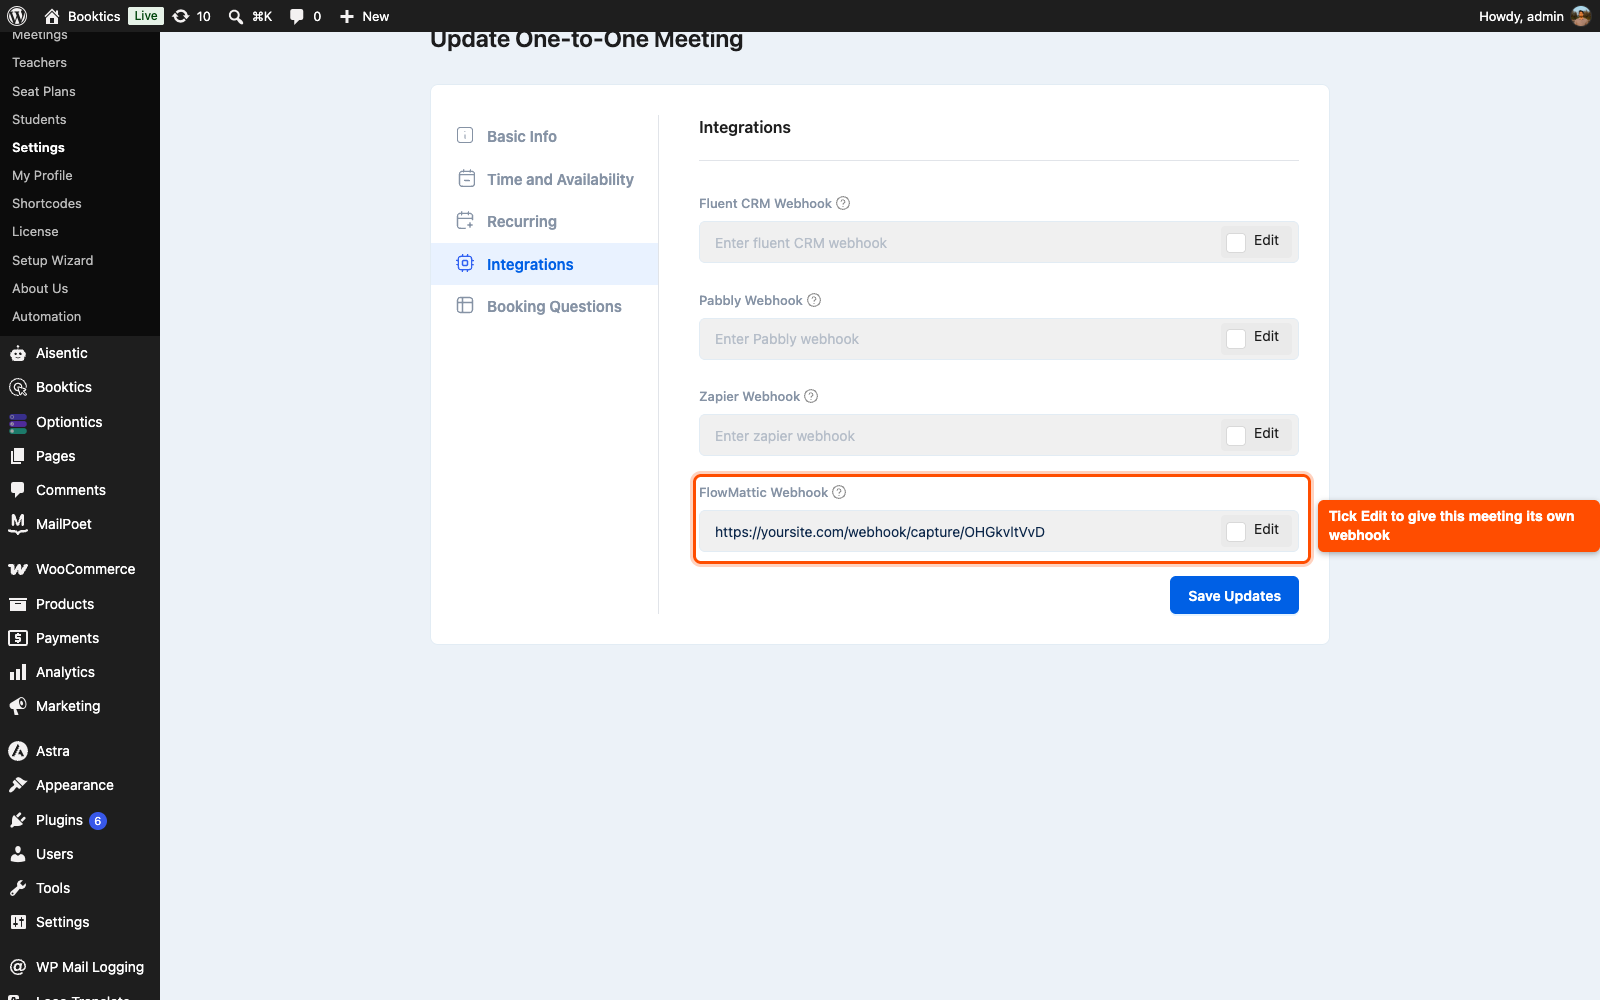
By default every meeting uses the webhook address from Settings. You can point a single meeting somewhere else instead, which is useful when one meeting type needs its own automation.
- Go to Timetics → Meetings and open the meeting you want to change.
- Open the Integrations step.
- Tick the Edit checkbox next to FlowMattic Webhook.
- Paste the webhook address of the other workflow.
- Click Save Updates.
Leave the checkbox unticked and the meeting keeps using the global address from Settings.
Step 6: Read the data FlowMattic receives
Every payload carries an event field that names what happened, so one workflow can branch on it.
| Event value | When it fires |
| booking.created | A new booking is made |
| booking.rescheduled | A booking’s date or time changes |
| booking.cancelled | A booking is cancelled |
| booking.payment_completed | Payment for a booking is finalised |
| booking.deleted | A booking is deleted |
Alongside event, each payload holds four groups: booking, customer, meeting, and staff. The booking group carries the invoice number, status, date, start and end time, timezone, location, join link, total, currency, payment method, custom form answers, seats, and guests. The customer group carries the name, email, phone, and billing address.
Tip: The booking.deleted event is the one exception. The booking record is already gone when it fires, so that payload carries only the deleted booking IDs. |
Frequently Asked Questions (FAQ)
| Q1: Does FlowMattic have to run on the same site as Timetics? No. The webhook address is a normal URL, so FlowMattic can run on any site you control, including a staging or local site. Paste that site’s webhook address into Timetics and the bookings travel across. Both sites need to be reachable over the internet for a live setup. |
| Q2: I turned on webhook authentication in FlowMattic and the bookings stopped arriving. Why? Timetics posts the booking as plain JSON with no authentication key and no signature. If the trigger’s Authentication setting asks for either one, FlowMattic rejects the request before your workflow runs. Leave that setting on Open, no authentication for the Timetics webhook. |
| Q3: Nothing arrives in FlowMattic. What should I check? Check three things in order. First, confirm the webhook address in Timetics → Settings → Integrations matches the one on the workflow’s Configure tab. Second, confirm the meeting is not overriding it on its Integrations step. Third, turn on WP_DEBUG and make a booking, then read wp-content/debug.log for a line starting with [Timetics FlowMattic]. |
Conclusion
The FlowMattic integration turns each Timetics booking into a trigger you can build on, so confirmations, CRM records, and internal alerts run without you touching them. Add your webhook address in Timetics → Settings → Integrations and capture one test booking to get started.